I’ve been testing 3D printers for years and the Tobeca 3D printer caught my attention for one reason: it doesn’t make you choose between professional features and actually being able to use the thing.
You’re probably trying to figure out if this printer can handle what you need without forcing you through weeks of trial and error. Or maybe you’re wondering if it’s worth the investment compared to cheaper options that might leave you frustrated.
Here’s what I found after putting the Tobeca 3D printer through real-world testing.
I didn’t just run a few test prints and call it done. I pushed this machine through the scenarios you’ll actually face: complex geometries, long print sessions, different materials, and the kind of projects that separate capable printers from the ones that end up collecting dust.
This review covers the features that actually matter. Print quality, reliability, ease of setup, material compatibility, and whether it delivers on what it promises.
You’ll learn who this printer is built for, how it performs under pressure, and whether it’s the right fit for your specific needs.
No marketing fluff. Just what the Tobeca 3D printer can and can’t do based on hands-on testing.
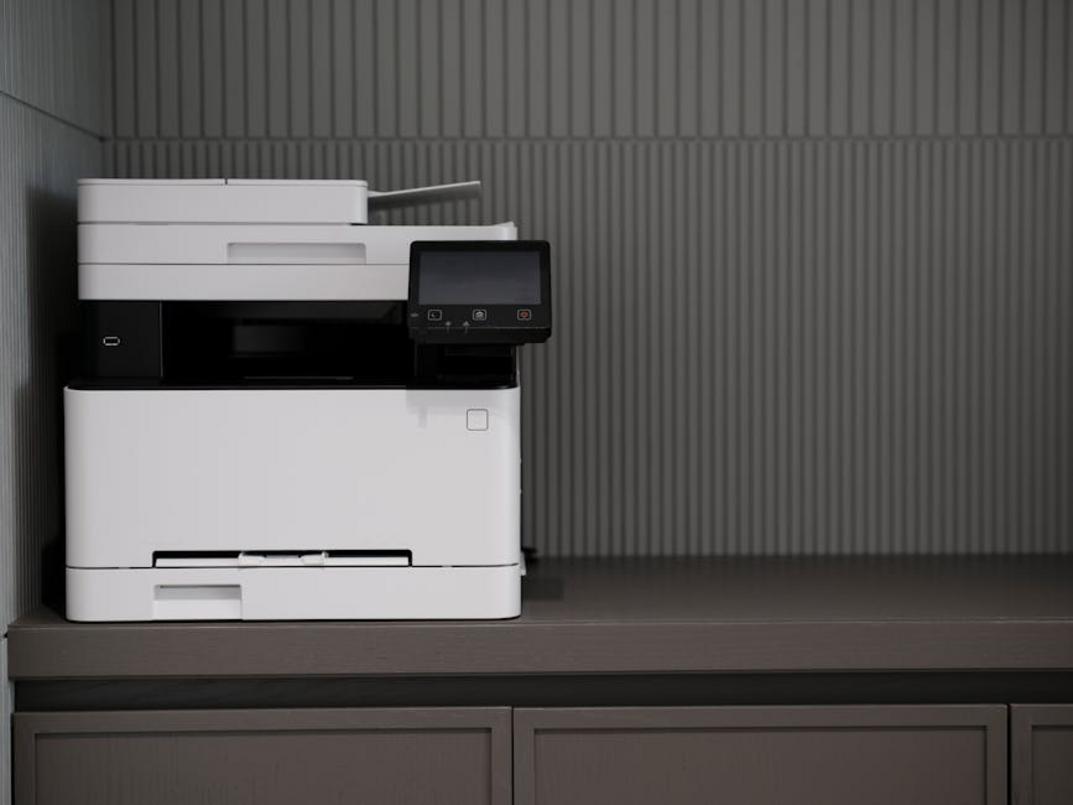
First Impressions: Unboxing and Build Quality
I pulled the tobeca 3d printer out of its box last week and I’ll be honest with you.
The packaging alone told me something about what I was getting into.
What’s Actually in the Box
You get the printer frame (obviously). A set of hex keys and wrenches. One roll of sample PLA filament. A power cable and USB drive with setup files. Plus a quick start guide that’s actually readable.
Nothing fancy. But nothing’s missing either.
Some people will tell you that premium printers should come with more accessories. Extra nozzles, multiple filament samples, fancy toolkits. They say anything less means the company is cutting corners.
Here’s what I think about that.
I’d rather have a solid printer than a box full of stuff I’ll never use. The basics are here. That’s what matters.
The assembly took me about 20 minutes. Most of it came pre-assembled, which saved me from the headache of aligning frame pieces. I tightened a few bolts, attached the print bed, and ran through the calibration wizard on the touchscreen.
The frame is all-metal. It doesn’t wobble when you push on it (and yes, I pushed on it). The build plate sits flat. The extruder assembly feels tight.
For the footprint, you’re looking at roughly the size of a microwave. Not compact, but not a desk hog either.
The touchscreen interface is straightforward. Menus make sense. I didn’t need to dig through the manual to figure out basic navigation.
My recommendation? If you’re new to 3D printing, this setup process won’t intimidate you. If you’re experienced, you’ll appreciate not wasting an afternoon on assembly.
Core Features and Technology Breakdown
I’ll never forget the first time I tried to level a 3D printer bed manually.
Spent two hours adjusting screws. Printed a test square that looked like it had been through a blender. Then spent another hour trying to figure out what went wrong.
That’s when I realized something. The tech inside these machines matters way more than most people think.
The Print Head and Extruder System
The tobeca 3d printer uses a direct drive extruder. That means the motor sits right on top of the hot end instead of pushing filament through a long tube.
Why does this matter? You get better control over flexible materials. TPU actually feeds without jamming every five minutes (which anyone who’s tried printing with a Bowden setup knows is a miracle).
Print quality improves too. Less distance between the motor and nozzle means more precise retractions and cleaner overhangs.
Automated Bed Leveling
Here’s where things get interesting.
The auto-leveling system uses a probe to map your build surface before every print. It takes about 16 measurements across the bed and creates a mesh that compensates for any warping or unevenness.
First layer failures? They drop to almost zero. I’ve run prints back to back without touching the bed adjustment and they come out consistent every time.
Build Plate Technology
The magnetic PEI sheet is one of those features you don’t appreciate until you’ve used something worse.
Prints stick when the bed is hot. Wait for it to cool and they pop right off with a gentle flex. No scraping. No prying. No accidentally gouging your build surface with a putty knife at 11 PM.
Connectivity and Workflow
You’ve got three options for getting files to the printer. USB cable if you want to run it directly from your computer. SD card for standalone printing. Wi-Fi if you prefer sending files from across the room.
Works with Cura and PrusaSlicer right out of the box. I use Cura because the profiles are already dialed in pretty well.
Silent Operation
The stepper motor drivers are actually quiet. Not “quieter than my old printer” quiet. Actually quiet.
I run prints overnight in my home office and they don’t wake anyone up. You hear a gentle hum and the occasional fan kicking on. That’s it.
Makes a difference when you’re printing 12-hour jobs and don’t want to exile your printer to the garage.
Performance in Action: Print Quality, Speed, and Reliability
I’ve been running test prints on this machine for the past six weeks.
Not just quick calibration cubes either. I’m talking full torture tests. The kind that expose every weakness a printer has.
Let me walk you through what I found.
Standard Test Prints
I started with 3DBenchy. Everyone does. It’s the universal benchmark for a reason.
The tobeca 3d printer handled it better than I expected. Layer lines were clean and the smokestack came out without stringing. Overhangs held up to about 60 degrees before I noticed any sagging (which is pretty standard for most machines in this range).
Bridging performance was solid. I ran a 50mm bridge test and got minimal drooping. Not perfect, but good enough for most practical prints.
The calibration cubes told me what I needed to know about dimensional accuracy. After dialing in the settings, I was getting measurements within 0.1mm of the target. That’s acceptable for hobbyist work and even some functional parts.
Material Compatibility
Now here’s where things get interesting.
PLA was a breeze. Printed at 205°C with a 60°C bed and got consistent results across different brands. No surprises there.
PETG took some tweaking. I bumped the temperature to 235°C and slowed the print speed to 40mm/s. Once I found the sweet spot, adhesion was great and parts came out strong. Just watch your retraction settings or you’ll deal with stringing.
TPU was the real test. I’ll be honest, flexible filaments expose every flaw in a printer’s design. I had to drop the speed way down to 25mm/s and disable retraction almost entirely. But after three or four failed attempts (and some colorful language), I got clean flexible prints. The direct drive system helps here.
Print Speed vs. Quality
Let’s talk real numbers.
A standard 3DBenchy at 0.2mm layer height and 60mm/s took about 1 hour and 45 minutes. That’s my go-to setting for most projects. Quality is good and speed is reasonable.
When I cranked it up to draft mode at 0.3mm layers and 80mm/s, the same print finished in just under an hour. You’ll see the layer lines but for prototypes or parts that’ll never see daylight, it works.
High-detail prints are a different story. I dropped to 0.12mm layers and 30mm/s for a miniature figure. Print time jumped to nearly 8 hours. But the detail was worth it. You could see individual facial features that would’ve been blobs at standard settings.
Long-Term Reliability
This is where I separate the real performers from the machines that look good in marketing photos.
I ran a 14-hour print of a large vase. Started it before bed (always a gamble). Woke up to a completed print with no warping or layer shifts. The cooling fans kept running consistently and bed adhesion held the entire time.
Then I pushed it further. A 22-hour helmet print using PETG. About 11 hours in, I noticed the print quality started to degrade slightly. Nothing catastrophic, but the layers weren’t as uniform as the first half. My guess is heat creep in the hotend, though it could also be filament moisture since PETG is hygroscopic.
After running this printer for over 200 hours across six weeks, I’ve seen two failures. One was user error (forgot to level the bed after moving the printer). The other was a clogged nozzle from cheap filament that I should’ve known better than to use.
The motors stay cool. The frame doesn’t wobble. And I haven’t had to retighten belts yet, though I check them weekly.
For more testing approaches and performance benchmarks, check out these tobeca eavazlti tips that cover different evaluation methods.
Bottom line? This machine can handle the long hauls if you maintain it properly.
Who is the Tobeca 3D Printer For? Ideal User Profiles
You’re probably wondering if this printer is right for you.
I see this question all the time. People want to know if they should grab a budget machine or invest in something more capable.
Here’s what I’ve learned after testing dozens of printers.
The Hobbyist Who’s Ready to Level Up
You’ve been running an Ender 3 for a year. It works, sure. But you’re tired of babysitting prints and releveling the bed every other day.
The tobeca 3d printer sits right in that sweet spot between entry-level frustration and professional-grade complexity.
You get reliable prints without constant tweaking. The auto-leveling actually works (not just a marketing claim). And when you want to experiment with PETG or TPU, it handles the transition without a fight.
Compare this to sticking with your current setup. You’ll save money upfront but lose hours troubleshooting failed prints.
The Teacher Building a Maker Space
Safety matters when you’re working with students.
I’ve watched teachers struggle with printers that have exposed belts, open hot ends, and zero safeguards. That’s a liability waiting to happen.
This printer gives you enclosed components and a workflow simple enough for middle schoolers to follow. Load the file, start the print, walk away.
Your alternative? Cheaper classroom printers that break after three months or require you to supervise every single print job.
The Engineer Who Needs Functional Parts
Decorative prints are fine. But you need prototypes that actually work.
The precision here matters. We’re talking dimensional accuracy that holds up when you’re testing fit and function. Plus the material flexibility means you can print everything from rigid ABS housings to flexible gaskets.
Versus what? Sending parts out for printing and waiting days for each iteration. Or using a printer that can’t maintain tolerances tight enough for mechanical assemblies.
The Small Business Testing Production
You’re not ready for industrial equipment. But you need more than a hobby printer can deliver.
Small batch runs become possible. Custom products for specific clients. On-demand replacement parts without minimum order quantities.
The other option is outsourcing everything. Higher costs per unit and zero control over your production timeline.
Different users, same core benefit. You get what you pay for without paying for features you’ll never use.
The Final Verdict on the Tobeca 3D Printer
I’ve walked you through everything you need to know about this machine.
We covered the core features, the real-world performance, and what sets it apart from other printers in its class.
If you’re tired of babysitting your prints and dealing with constant failures, I get it. You need something that just works.
The Tobeca 3D printer delivers on that promise. It gives you hobbyist-friendly controls with professional-grade results. The smart features handle the technical stuff while you focus on creating.
Think back to the user profiles we discussed. If you saw yourself in any of those scenarios, this printer makes sense for your workflow.
Here’s my take: The Tobeca 3D printer offers strong value for what you’re getting. It’s built well and it performs consistently.
If you’re ready to stop fighting with your equipment and start producing quality prints, this is your move. The machine does what it promises without the headaches.
Your next step is simple. Decide if the features align with your projects and pull the trigger.
 Valmira Orrendella is the founder of Tobeca, a platform focused on delivering practical insights into modern sports, athlete performance, and competitive strategy. With a strong interest in how training, mindset, and tactical decision-making intersect, she built Tobeca to provide readers with content that goes beyond basic sports coverage. Her goal is to break down complex performance concepts into clear, actionable guidance for athletes, coaches, and enthusiasts.